Understanding the desire to make cubby houses
 I can't say I understand fully why cubby houses are such fun to make and even just to use. But for me part of the fascination was just wanting to make things and feel a sense of achievement. But I was also obviously keen to create my own space which I could retreat to and which I could share with friends for all those conversations where we shared secrets, invented codes to communicate, told jokes etc. From a very young age lots of children have the desire to find themselves small child-sized spaces to sneak into (this gets some of them into difficulty). For most children the following are probably the most common attractions and benefits of cubby houses:
- The fun of planning and making the cubby.
- The gross and fine motor skills developed on the way.
- The attraction of having personal space.
- Having a special space to share with other children.
- The chance to learn how to get along with other children as turns are negotiated, furniture shared etc.
- A place to talk, play, write, eat, play games, read etc
Types of cubby houses
Because the world has changed very few children build the type of cubbies and structures that I did as a child but there are plenty of other simple options. Here are a few.
a) The Blanket Option
One of my grandchildren's favourite activities at our home is to make a cubby using a sheet, bedspread or blanket (sorry Carmen), which we attach to the top of the wardrobe and then link to 'Nanna's bed'. We usually put a small mattress on the floor or use cushions (see opposite), add some books and food and they have a perfect retreat space. The inside option is perfect for wet days.
b) The Tarpaulin Option
 Wherever you can attach a tarpaulin between a fence and a tree (or the shed) you can make a cubby. In our back my grandaughter Rebecca loves to build a cubby under a tree with the tarp attached to the back fence and tied to the trees. We move a table and chairs in and Rebecca heads off for some books and Nanna provides the food. The shot opposite of Jacob and his cousin Samuel was an impromptu variation on this option.
c) The Cardboard Box Option
 I always get excited when we have a large box that an appliance arrives in. Don't recycle big boxes before you've had some fun with them. The shots here show how Carmen filled a couple of wonderful hours with three of our grandchildren. With a little help Jacob designed and made most of the cubby himself.
As you can see from the photos below Jacob, Rebecca and Elsie all had a hand in the cubby. Elsie was only about 8 months at the time so she mostly watched, grabbed things and tried to communicate in between giggles and squeals of delight.

My favourite part of this 'structure' is the dog flap for his 'pet' puppy which Jacob insisted on adding. Elsie seemed determined to help in some way, enjoying the action while Chief Engineer Jacob put his finishing touches to his masterpiece.
d) The Bought Cubby Option

You can buy lots of cubby houses, tents, forts etc that while a more expensive option can still be a great source of creative play. They at least offer children the chance to engage in creative play, learn how to relate to other children in varied games and forms of interaction.
e) Building a Cubby at Home
If you're lucky enough to live in a house with a yard with enough space to place a cubby, then building your own cubby is a lot of fun. While children can't do much of the building they will love 'helping' by carrying materials, watching each step of the construction process and progressively moving things in. Below are three generations worth of my efforts.
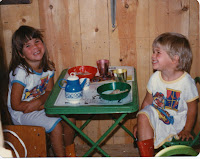
When our children were little we rented a house and so building an elaborate cubby was out of the question. But our neighbours had two large wooden boxes that came from a factory that they gave to us and I joined them together to make a cubby that was placed in our carport. With a few windows cut out and a door, it was well used for a number of years.
They had many a tea party in there (my daughters Nicole and Louise are pictured on the left in 1984), read lots of books, resolved disputes over furnishings and engaged in lots of creative play together. This cubby cost almost nothing. I bought some hinges for the door, a latch to keep it closed, some plants for the flower boxes. It probably cost less than $20 in today's currency and took me not much more than a day to make.
Of course you can build more elaborate structures. Rebecca and Elsie are relaxing on the veranda (below) of a cubby I bought cheaply second hand and which we moved in pieces to my daughter Nicole's house for reconstruction. When they moved house after 3 years we moved it again. I needed to do a more significant reconstruction (it was falling to pieces) this time. Just like Lincoln's family log cabin there are no doubt a few bits of the original still in the structure, but not many.
Above: Enjoying the delights of late afternoon on the front veranda
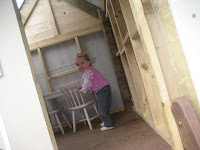
 Now, my latest effort built for two of my grandchildren who live in the country, is just a tad more ambitious. With a cubby of this scale you need a few woodworking skills and also need to consider your neighbour's privacy and you may even need to check out local council regulations. The cubby took about a week to build (spread out over a number of weekends) but will give years of fun to Samuel and Evelyne as well as many of their friends and visitors. I got the basic idea for the cubby from a hardware store website (here) but needed to pretty much design this version myself. If you raise a cubby off the ground you will need to install rails and make sure that it isn't too high (this one is 1.2 metres high).
I also designed the cubby so that my youngest grandaughter could easily do things downstairs due to mobility issues caused by a genetic disorder. I've placed a blackboard on the 'Ground floor' and plan to add a shop counter later. Needless to say, she's worked out how to get upstairs and wants to be there most of the time anyway.
What to put in the Cubby?
What you put into a cubby will depend on the type of cubby (permanent or temporary), its size and your children's interests, but a few basic things that include would be:
- A table and chairs (or something to it on like a small covered foam mattress).
- A shelf or box for putting special things in.
- Some books.
- A tea set and plastic cutlery.
- Maybe some dress-up clothes (if you have space).
- There are also a lot of toy appliances that you can add (we've used toasters, a microwave and plastic vegetables).
Cubby design that was the inspiration for my cubby design above (here)
A more conventional Cubby design and plans (here)
All posts on creativity (here)
All posts on play (here)


